
Compressing Files
Compress mode reduces file size without changing the format. A JPEG stays a JPEG, just smaller.
How to use
Section titled “How to use”- Switch to the Compress tab
- Drop files into the window or click Add Files
- Pick a preset or configure custom settings
- Click Compress
Compressed files are saved with a _compressed suffix by default. You can change this to any pattern, including EXIF-based names like {date}_{original}, in Settings → Output. See output and naming.
If the compressed output isn’t smaller than the original, Picmal discards it and leaves the original untouched.
Space saved
Section titled “Space saved”When a batch finishes, Picmal totals up how much space you freed and shows it in the bottom bar and the completion notification, with a comparison to put the number in context, like “Freed up 9.66 GB · about a 4K movie 🎬”.
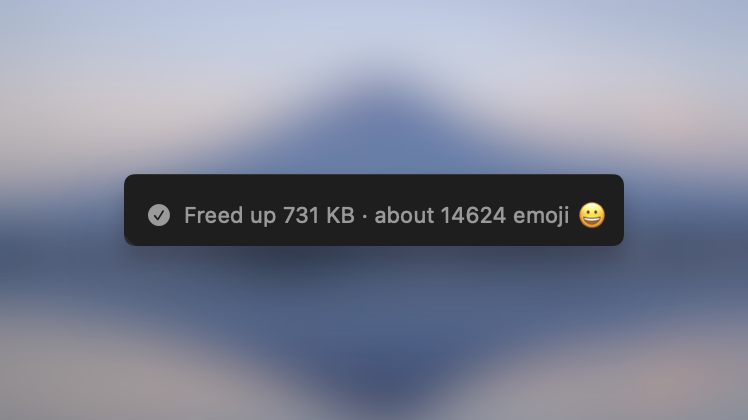
Image presets
Section titled “Image presets”| Preset | Best For | JPEG Quality | PNG Level |
|---|---|---|---|
| Maximum quality | Archival, print, master copies | 92% | 2 |
| High quality | Professional websites, portfolios | 85% | 3 |
| Balanced | General web use, documentation | 80% | 6 |
| Web optimized | Fast-loading websites | 75% | 7 |
| Social media | Instagram, X, Facebook | 70% | 8 |
| Maximum compression | Email attachments, slow networks | 60% | 9 |
| Custom | Your own settings | You choose | You choose |
Audio presets
Section titled “Audio presets”| Preset | Codec | Bitrate | Best For |
|---|---|---|---|
| Maximum quality | FLAC | Lossless | Archival, music production |
| CD quality | FLAC | 16 bit / 44.1 kHz | Lossless CD-equivalent rips |
| High quality | AAC | 256 kbps | Music listening |
| Balanced | AAC | 192 kbps | General use |
| Podcast | Opus | 96 kbps | Speech, podcasts |
| Voice memo | Opus | 64 kbps (mono) | Voice recordings |
| Maximum compression | Opus | 48 kbps | Minimum file size |
| Custom | You choose | You choose | Your own settings |
Video presets
Section titled “Video presets”| Preset | Codec | CRF | Speed | Best For |
|---|---|---|---|---|
| Maximum quality | H.265 | 18 | Slow | Archival, mastering |
| High quality | H.265 | 20 | Slow | High-quality delivery |
| Balanced | H.265 | 23 | Medium | General use |
| Web optimized | H.264 | 23 | Medium | Maximum compatibility |
| Social media | H.264 | 25 | Fast | Social media uploads |
| Maximum compression | H.265 | 28 | Medium | Minimum file size |
| Custom | You choose | You choose | You choose | Your own settings |
A preset per file
Section titled “A preset per file”Convert and Compress both have a Quality column. Each row shows the preset that will run on that file: the one from Settings, until you pick another for that row alone. It reads Off when an image won’t be compressed, so you never see a preset that does nothing. Compress one video hard and leave another balanced in the same batch, without running two passes.
It sets the bitrate and codec recipe, never the output format. The column was called Preset until 1.8.9, which led people to expect it to pick a second file type.
Your saved presets appear in the row menu alongside the built-ins, and the Saving estimate updates as soon as you change one.
To change several rows at once, tick their checkboxes (Compress has the same checkboxes as Convert, plus a Select all videos shortcut) and set the preset from the selection bar. Those ticks also decide which files the next run covers; see run only the files you tick.
A row with its own preset shows a small pin. Pinned rows keep their preset when you change the one in Settings; delete a custom preset and the rows using it fall back to Settings.
A per-file preset changes compression quality only. Resize, color space, and DPI still come from Settings and apply to the whole batch.
Before/after preview
Section titled “Before/after preview”After compressing an image, click the screen icon on any processed file to open a before/after slider. Drag it around to compare the original and compressed versions side by side, useful for dialing in quality when you’re not sure how far you can push it.
Custom settings
Section titled “Custom settings”Pick Custom to dial in your own quality, codec, bitrate, and other settings per format. See image compression and audio & video for details.
Save your own presets
Section titled “Save your own presets”Once you’ve tuned settings you like, click Save as preset, give it a name, and it appears alongside the built-in presets the next time you compress. Custom presets work for images, audio, and video, so you can keep a “client delivery” or “podcast” preset a click away instead of re-entering values each time.